

Description
Pick a slot on the screen. Present your spool. Its details are sent to your compatible printer.
With the TigerSpool Kit (ESP32-S3 + PN532), build your own touchscreen RFID/NFC reader to make filament setup easier. A TigerTag chip identifies the spool and TigerSpool sends its data to the selected slot, within what the printer accepts. Less typing every time you change spools.
The kit brings together a board with a touchscreen, a PN532 V3 reader and 10 free TigerTag chips. The project provides the open-source firmware and the enclosure files to print.
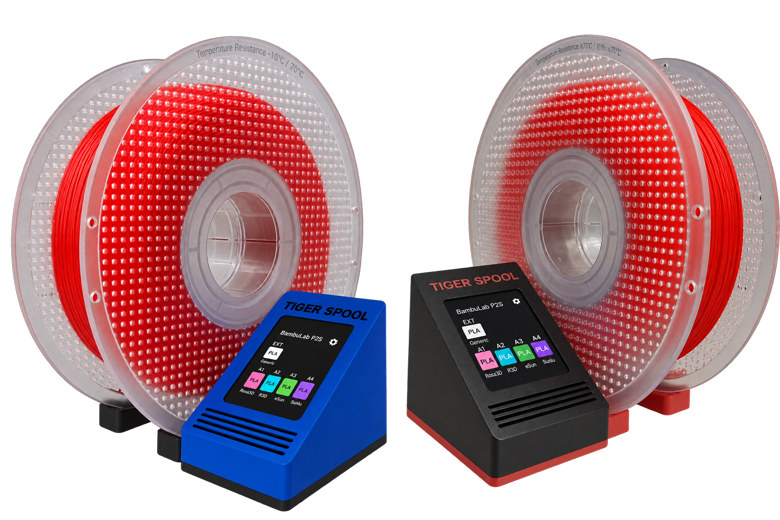
Example builds with the project's printed shells. Spools shown to illustrate use.
Install the firmware Read the TigerSpool guide
What's in the kit
|
1 × ESP32-S3 board with a 2-inch touchscreen To choose the printer, select a slot and look up the spool. The project's reference hardware is the Waveshare ESP32-S3-Touch-LCD-2: 240 × 320 IPS screen, 16 MB of flash memory and 8 MB of PSRAM. |
|
1 × PN532 V3 RFID/NFC module The reader that picks up the data from TigerTag chips. It talks to the board in HSU (UART) mode. |
|
10 free TigerTag chips To identify your spools once encoded. With two chips on opposite sides of each spool, you can equip five spools. |
For the build, plan a printed enclosure, a USB data cable, a USB power supply and the four wiring connections between the board and the reader. Check the accessories supplied with your kit before assembly.
Choose, scan, load the spool
- Select the slot on the touchscreen.
- Present the TigerTag chip to the reader. As soon as it is read, the data is sent to the compatible printer.
- Put the spool in the slot shown and load the filament the way your machine usually does.
Material, brand, colour and temperatures: TigerSpool uses the chip's data and adapts it to what the printer can take. Some models limit the available material names or colours. The device fills in the filament settings: it does not physically load or unload the filament.
Scan mode: identify a spool
Look up the data stored on the chip without assigning it to a printer: material, brand, colour, temperature ranges, drying instructions, recorded remaining amount and certification status. TigerSpool is not a scale: the amount shown comes from the chip, it is not measured by this kit.
You print the shell
The desktop stand comes in two mirrored versions: spool on the left or on the right of the screen. Pick the one that suits your space. These models are designed to print without supports and to assemble without screws or inserts.
Stand with the spool on the left Stand with the spool on the right
The project also offers shells made for some printers, including the Creality K2/K2 Pro and the FlashForge Creator 5/5 Pro. The electronics and firmware stay the same. The shell fits the machine.
See the 3D files and printing instructions ›
Getting started, step by step
- Set up your account in Tiger Studio Manager. Install the app on Windows, macOS or Linux, create your TigerTag account and add your printers. TigerSpool picks up that list: with no printer added to the account, its list stays empty.
- Assemble the electronics. Follow the official guide: PN532 in HSU (UART), both switches OFF and wiring on GPIO43/44. Fit the parts into the shell you chose.
- Install the firmware from a computer. Plug the board in with a USB data cable and use the web installer with Chrome, Edge or Opera. Installation uses WebSerial: Safari, Firefox and mobile browsers will not work.
- Connect TigerSpool. Choose your language, set up Wi-Fi with the QR code and connect your TigerTag account. Your printers are then synced.
- Prepare your chips. Use a spool that already carries a filled-in chip, or encode your TigerTags with a compatible tool, for example Tiger NFC Connect on an NFC-capable phone.
Once set up, TigerSpool handles everyday tasks from its touchscreen. It offers nine languages, including English, and firmware updates over Wi-Fi.
Download the apps See the wiring guide
Check your printer's compatibility
The project supports several brands, but the features available depend on the model, the firmware and the connection mode. Compatibility does not automatically extend to every machine of a brand.
| Brand | Good to know before installing |
|---|---|
| Bambu Lab | To assign a filament: LAN mode and developer mode required. In the cloud, slots can be viewed, but assigning from a chip is not supported. |
| Creality | Local communication on supported models. The matrix documents tests on the K2 and K2 Plus in particular. |
| FlashForge | LAN mode or the FlashForge x TigerTag firmware (LAN + Cloud), and credentials depending on the model. Colours may be adapted to the palette the machine accepts. |
| Snapmaker | Local connection through Moonraker on the models documented by the project. |
| Anycubic | In LAN, a first pairing in AnycubicSlicerNext is required. The matrix documents reading and assigning validated on the Kobra X in the cloud; assigning in LAN is still to be confirmed on a machine. |
| Elegoo | Reading documented on the Centauri 2/Carbon 2 family. The matrix notes that assigning the filament is still to be confirmed on a real printer. |
For a local connection, TigerSpool must be able to reach the printer on the network. Guest networks and Wi-Fi isolation can block this communication. Change filament settings when the printer is not printing.
Check the models and current support level ›
Your reader, your enclosure, an open project
A touchscreen, an NFC reader and open-source MIT-licensed firmware to connect your TigerTag spools to your compatible printers.
Install the firmware
TigerSpool Kit (ESP32-S3 + ...
Get notified when this item is back in stock

Press & drag to view